Undoubtedly, LED strip lights are a great addition to every interior space. They can create perfect lighting for every location and interior. Plus, the point is that they come in different sizes and specifications and, thus, can be easily tailored. Another thing is that LED lighting is affordable and thus a safer alternative. They can replace traditional bulbs and yellow lights in different styles. However, the real question is how to connect LED strip lights.
Wait, why does the right connection matter? When connected optimally, LED strips give you maximum and effective lighting. Here is a guide that tells you everything about LED strips. You will learn how to connect LED light strips and use them wherever possible. Let’s jump to the critical sections:
How to Connect Multiple LED Light Strips?
There are several ways you can connect different LED light strips. For example, connect an LED strip using a connector or solder. You can choose the method that perfectly fits your needs and requirements. However, you must correctly cut and place the LED to choose the right method. Here are the steps you need to follow:
It All Starts With Cutting the Strips:
The first step in the connection is cutting the strips correctly. First, measure the space where you plan to use the LED. Then, mark a check spot on the strip for accuracy before cutting. Use sharp scissors to make perfect and accurate cuts.
Different Ways of Connecting LED Strips:
Now comes the major question: how to connect LED strip lights together. There are different ways through which you can connect the LED strip lights, including:
1. Connecting the Wires with a Strip Connector

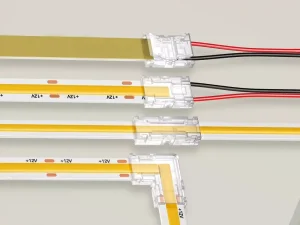
Using a strip connector is the first method that helps wiring LED strip lights together. But it would help if you chose a strip connector that blends with your LED type. For example, a monochrome strip light adapts with different connectors compared to RGBs. You can refer to the instructions on your package to make an informed decision. In general, there are two types of connectors:
- Clip-On
- Fold-Over
If you are looking to connect the LED lights super close to each other, you can’t use a fold-over connector, as it is bulkier. If you use a fold-over connector, it won’t give you enough space availability. Further, the clip-on connector will slide right into the strip. Here’s how you can connect LEDs using a connector:
a. Start sliding the strip into the connector. Whatever the connector you choose, the process is the same. Slide the connector to the end of the light strip into the open end of the strip. Do the process gently to avoid further damage.
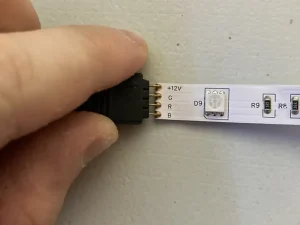
b. Simultaneously, the wire should be aligned according to the color strip. You can ensure it by checking the light strip. At the end of the light strips, some letters tell you which colored dreams you should choose. Plus, there will be a + and – sign on each strip to help you make an informed decision.
c. Once you have properly aligned the connector, close the device. If you have used a fold-over connector, close it by pressing down on the flap. On the other hand, if you have a slip-on connector, you can lock the strip by pressing the black button on each side.
d. Once you have completed these steps, you can simply plug the strip into the power supply and see how it functions.
2. Connecting Strip Lights by Soldering
Another method is soldering. But what is soldering, and how can it be used to connect LED strip lights?

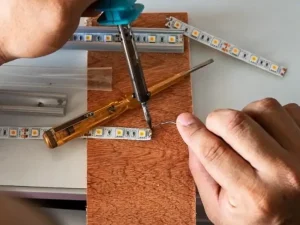
Soldering is a simple process that helps join two or more materials using melted alloys called solder. Here’s how you can connect two LED strips using soldering:
a. The first thing you should consider is soldering the metal in an open, spacious room. As burning metals can be risky and unhealthy, an open space will allow clean airflow. It would be perfect if you opt for a room that has an extinguisher fan. To add another layer of safety, wear safety gear and follow the necessary precautions:
- tie and mask your hair
- avoid wearing loose clothing
- always wash your hands after finishing the procedure
- add necessary gear like safety goggles, gloves, etc.
b. Soldering starts with pre-tinning. Prepare the wire for soldering by placing two ends on one another. Pre-tinning involves adding a little solder to each wire end. It will ease the process and allow you to connect the strips. However, there is one thing that you must consider. Don’t apply a lot of solder since it shouldn’t be visible on the wire. Even a drop is sufficient to connect the two strips. Plus, you should only add the amount of solder that easily blends. The tiny dots of the solder on each strip end act as contact points that will help them to get attached.
c. Now, use the iron to attach the strips at their corresponding contact points. You should be really careful and slow while connecting the two ends.
d. Match the LED strips according to the color labels on the light strip.
e. Plus, avoid heating the wires for too long, as it might result in LED failures.
f. Once you have followed all the above steps, your LED strips will be connected, and you can check their functionality.
How to Connect LED Strip Lights to 12V Power Supply?

Once you have accurately cut the LED lights and then connected them, comes the power supply. For that, all you need to do is plug the strips into the power supply. In general, a 12V power supply is sufficient to light the LED strips fully. Further, you can easily install the strips as most of these come with self-adhesive. Before you install the LED lights, consider the power supply and contour it accordingly.
Way Forward
Wiring LED lights together is not a difficult task at all. After reading the blog “How to connect LED light strips,” we hope it is no longer a question for you. Remember, LED lights are great alternatives for modern lives. Also, connecting LED strip lights is a straightforward process. All you need to do is follow the detailed steps for a smooth experience.
