
Outdoor lighting makes your property look amazing after dark. It creates nice spaces that make your home look good beyond sunset. Learning how to install landscape lighting by yourself saves money. It also adds good value to your property. These lights work well for most homeowners since they use low-voltage. You only need basic tools and a little time to complete the setup. Installing outdoor landscape lighting gives you practical benefits aside from making your home look better. Proper lighting makes things safer by lighting up walkways, steps, and dangerous areas around your property. Smart lighting placement helps with security and improves your home’s aesthetic at nightfall.
Landscape Lighting Basics
Before you start installing, you need to understand the basic parts of outdoor lighting systems. Most home landscape lighting systems use low-voltage power. This means they run on 12 volts instead of the normal 120-volt power in your house. This makes the job safer and easier for you to handle.
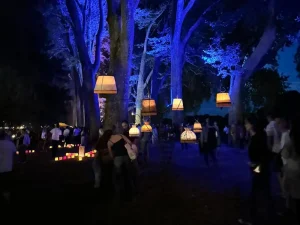
Low voltage landscape lighting installation has many benefits over regular high-voltage systems.
First, the lower voltage makes it much safer. You have less risk of getting shocked during setup and care. Second, these systems use less power than most household devices. This means lower electric bills for you over time. Third, the lights and bulbs last longer because of the gentle power.
Planning Your Landscape Lighting Design
Good planning is the key to success when installing outdoor landscape lighting.
Start by walking around your property during the day and at night. This helps you see areas that need light. Then, figure out what you want your lighting to do. You could highlight some appealing features of your house, light up walkways, or add lights for extra security around doors.
When planning your landscape lighting installation, focus on making layers of light in your outdoor space. You can combine different lighting methods.
Use uplighting for trees and house features. Use downlighting for general area lighting. Use path lighting for walkways and steps to enhance visibility.
Also, think about the colour of your bulbs. Warmer colours create a cosy feel, while cooler colours help you see better.
Drawing your lighting plan on paper helps you see the final result before you start. This planning step will help you determine the amount of power you need. You can then pick the right size transformer for your system. Making a sketch also helps spot problems like sprinkler systems, buried utilities, or harsh terrain.
Gathering Your Tools and Materials
You’ll need some basic electrical tools, like;
- Wire strippers
- Electrical tape
- Waterproof wire connectors and
- A tester for checking connections.
You also need landscaping tools like;
- A spade
- Trenching shovel and
- Measuring tape for running cables.
For the lighting system, you need a transformer that can handle your total power needs. Buy low-voltage cable designed to handle being buried in the dirt. This cable handles moisture and soil extremely well.
Next, choose lights that suit your design goals and climate.
Safety gear is also important for any electrical job. Have safety glasses, work gloves, and a GFCI (Ground Fault Circuit Interrupter) outlet ready before you start. If you’re running cable over long distances, think about renting a trenching tool. This can save you plenty of time and effort.
How to Install Landscape Lighting in 6 Easy Steps
Step 1: Prepare Your Work Area
Start by preparing your work area to ensure your landscape lighting installation goes smoothly.
Call your local utility marking service at least 48 hours before you start digging. This service marks buried cables, gas lines, water pipes, and other utilities for free. Wait for the markers before you dig to prevent dangerous accidents and costly damage.
Gather all your tools and materials. You’ll need;
- Wire strippers
- Electrical tape
- Waterproof connectors
- A multimeter
- Spade
- A trenching shovel and
- Measuring tape.
Lay out your lights, cable, and transformer near your starting point.
Review your lighting plan one more time and walk the route to make sure everything is in order. Check the weather forecast and avoid installing during rain or when the ground is frozen.
Step 2: Install the Transformer
Installing the transformer is your first big step in any low-voltage landscape lighting installation.
Choose a location within 6 feet of an outdoor GFCI outlet but protected from direct rain. Mount the transformer on a wall, fence, or post at least 12 inches off the ground using the included mounting brackets. Make sure there’s at least 6 inches of clearance on all sides for proper airflow.
Turn off the power at the circuit breaker before making any electrical connections. Connect the transformer’s power cord to the GFCI outlet.
Most transformers have a built-in timer and photocell – set these according to your preferences. The photocell automatically turns lights on at dusk and off at dawn. The timer lets you set specific on/off times.
Test the transformer by turning it on briefly to make sure it receives power.
Step 3: Dig Trenches for Cable Runs
The next step before installation is to run the low-voltage cable.
Start digging trenches from the transformer location toward your first light. Make trenches 6 to 8 inches deep and about 4 inches wide.
Use a trenching shovel or spade to create clean, straight trenches. In areas with hard clay or rocky soil, you may need to dig deeper to reach softer soil. Keep trenches as straight as you can to make cable installation easier. Avoid sharp turns that could damage the cable later.
If you need to go around obstacles like trees or sprinkler heads, make gradual curves instead of sharp bends.
Mark the trenches with spray paint if you plan to take breaks, so you don’t forget their locations. Remove rocks, roots, and debris from trench bottoms to protect the cable.
Step 4: Install the Low-Voltage Cable
Select the right cable size for your run length.
For runs under 100 feet, 12-gauge cable works well. For longer runs up to 200 feet, use 10-gauge cable to prevent voltage drop.
Start laying cable from the transformer and work toward your lights. Unroll the cable carefully to avoid kinks and twists. Lay the cable in the trench bottom without stretching it tight. Leave about 10% extra length to account for settling and future adjustments. At each light location, leave 12 to 18 inches of extra cable coiled in the trench for connections. Don’t pull the cable tight between points – this can damage it over time.
In areas where you could dig again (like flower beds), consider running cable through PVC conduit for added protection.
Step 5: Connect the Fixtures
Before making any connections, double-check that your transformer is turned off.
Most landscape lights use quick-connect fittings that pierce the main cable without cutting it. These connectors have sharp prongs that push through the cable insulation to make contact with the copper wire inside.
Position each light in its final location before making connections. Strip about 1/2 inch of insulation from the fixture’s lead wires using wire strippers. Insert the lead wires into the waterproof connector along with the main cable. Make sure the connector pierces the main cable properly – you should feel it click into place. Apply dielectric grease to all connections to prevent corrosion, especially in areas with high moisture or salty air. For fixtures that don’t use quick-connects, strip 1/2 inch from both the main cable and fixture wires. Twist matching wires together clockwise and secure with waterproof wire nuts designed for direct burial. Wrap each connection with electrical tape, then place them in a waterproof junction box if your local code requires it.
Step 6: Test Your System
Testing is crucial before you backfill the trenches.
Turn your transformer back on and check each light individually. Use a multimeter to measure voltage at each fixture – you should see between 10.8 and 12 volts at each light. If the voltage is significantly lower, you may have a poor connection or need a larger cable for long runs.
Check that each light produces the expected brightness and beam pattern. Walk around in the evening to see how the lighting looks from different angles. Make sure path lights don’t create glare or harsh shadows. Adjust fixture angles as needed before final installation.
If any lights don’t work, check connections starting from the transformer and working toward the problem fixture.
Once everything tests properly, carefully backfill the trenches. Add soil gradually and tamp it down gently to avoid damaging the cable. Don’t use rocks or hard debris as backfill. Leave fixture locations slightly raised since the soil will settle over time.
Finally, mark cable locations on your property plan for future reference when digging in these areas.
How Much Does It Cost To Install Landscape Lighting?
The amount of money you’ll spend on installation depends on several things. These include the complexity of your system, the quality of your lights, and whether you hire pros or do it yourself. A basic DIY low-voltage system for a small yard usually costs around $500. More fancy setups can cost $1,500 to $3,000 or more.
Professional installation is more expensive than DIY projects. The fee ranges from $2,000 to $8,000 for most homes. However, professional installers bring skills, warranties, and often better lights to the table. This makes the extra cost worth it for many homeowners.
Complex jobs with lots of trenching, multiple zones, or smart home features may require professional help.
As a more comprehensive breakdown;
Transformers cost $100 to $400 based on size and features.
Good lights cost between $25 and $150 each.
Low-voltage cable costs about $0.50 to $2.00 per foot.
Other supplies like connectors, mounting hardware, and trenching materials add an extra $50 to $200 to most projects.